Sunday, September 30, 2018

Dark Angels Primaris HQ


I've had the Dark Imperium box set since the day it came out, but hadn't done much with it, other than build all of the Death Guard stuff (to sell on), and one Intercessor, just to see what it would look like. However, I have taken a break from the Warhound Scout Titan I've been painting to try and get the contents of Dark Imperium out of the way, as I have a whole bunch of other Primaris stuff still in the boxes that I'd also like to start.

Now, I know that the Primaris Marines are a divisive subject, and although I think they were a little bit shoehorned into the storyline, I have to say that I really like them, at least from an aesthetics point of view, to the point that the rest of my Dark Angels (entire 3rd Company plus lots of supporting units) probably won't be getting much love from me - sorry guys, but the new Marines just do it better! They are sized how I always thought they should be (in comparison to regular humans), the weapons look cool, the armour is more refined, and because they're new (digital) sculpts, the design and plastic is so much nicer and fresher, especially as some of the old Marines are looking incredibly tired - how long have we had that Azrael model for?!

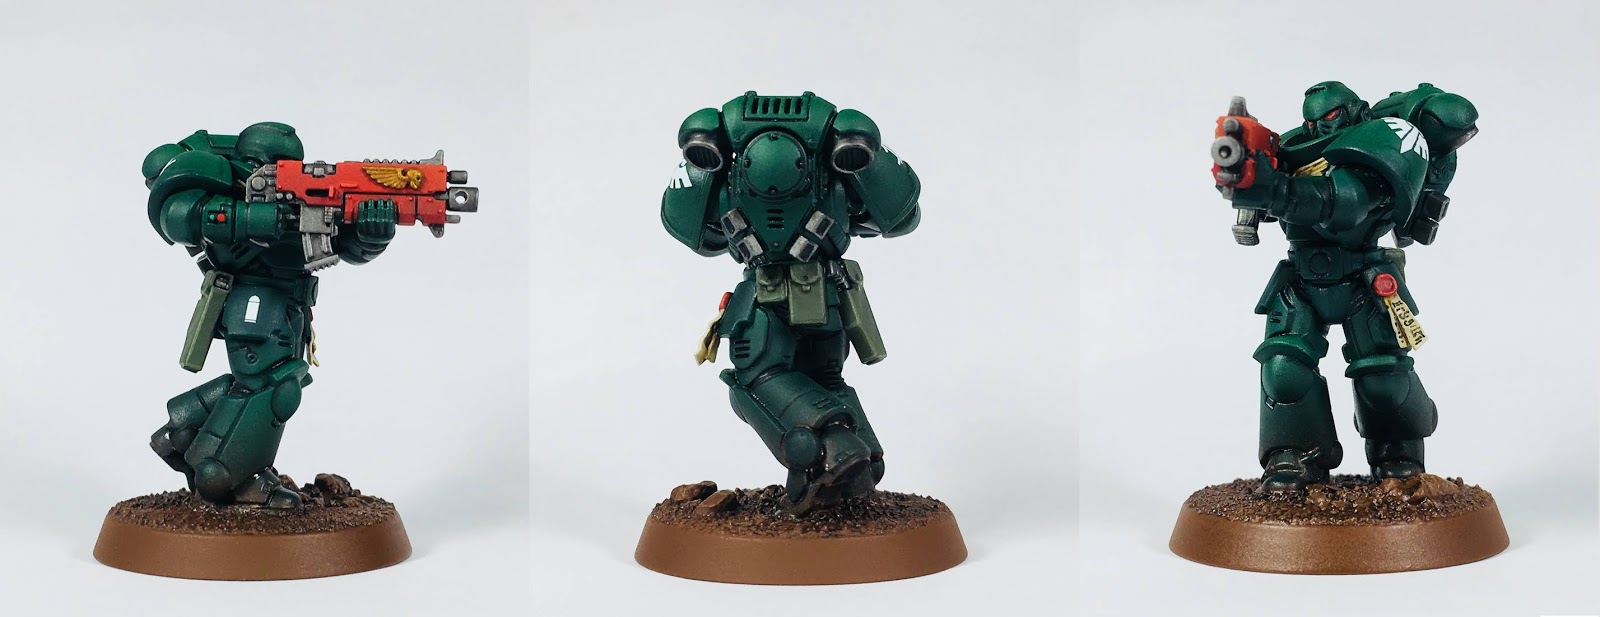
I've come up with a quicker than usual painting scheme that revolves around an airbrush basecoat for the armour and furniture of the firearms, with brushed in details on everything else. I have gone against the trend that I had with all my other Dark Angels and decided against the extreme line highlighting - to be honest I actually think the effect is a bit goofy, and time consuming - it was the part of painting a miniature that I always disliked.  I plan to do a step-by-step guide as I build and paint the rest of my Primaris stuff. Until then, please enjoy these photographs of the Captain, Lieutenants and the solitary Intercessor:


Sunday, September 16, 2018

Warhound Scout Titan - part two - painting the legs

The Warhound has now started to shape up. I covered the build in my last post, and have moved onto painting. I was incredibly concerned about paint adhesion, despite washing the resin multiple times, so I hit the whole thing with some Testors Dullcote matte varnish, then with some grey car primer spray. I use these two sprays exclusively on everything that I paint, although the varnish only usually gets used once painting has finished. I love the finish it gives, as it seems to give a final stage of blending - I hope that laying down a basecoat of it first will help. Anyway...

The base for each foot had been detailed with small stones, various grades of sand and gravel, some resin skulls from Secret Weapon Miniatures (highly recommended bits and company!), and a small piece of wall surrounded by some generic debris - the Warhound's right foot has smashed straight through this.

During the build, I had made sure to keep the armour panels separate, to aid in ease of painting. Everything that wasn't armour was airbrushed Abaddon Black, then Leadbelcher (trying my best to spray lightly in areas of shadow, to leave some of the black showing through). I wasn't confident that I coud pull off a cool looking airbrush only paintjob on the metal parts, so I moved onto brushwork. Ultimately, I wanted the metal to look tarnished and worn, which would make sense for a war machine that could be thousands of years old. Everything got a Vallejo black wash (only because I had ran out of Nuln Oil), and I drybrushed Leadbelcher, Chainmail and Brass Scorpion liberally over everything. The pistons and feet ball joints were picked out with Chainmail, as these are major moving parts that would remain shiny, with a touch of Seraphim Sepia near the bottom to represent blessed lubricant (all praise the Omnissiah!).

As for the toes and the armour panels, these were a little bit more delicately airbrushed than the metallic parts. I used Abbadon Black, Mechanicus Standard Grey, and Dawnstone - these were sprayed on in that order, with each colour leaving a little of the previous step showing through at the edges, giving what I think is that typical airbrushed tonal variation. The metallic trims were picked out with Leadbelcher, washed with Devlan Mud, then the rivets shaded with Nuln Oil followed by highlighting with Chainmail. The central rivets were picked out with Retributor Armour, adding a bit of a difference to the paint scheme, which to be honest, I was concerned would end up looking a bit bland. I'm not a huge fan of the bright and colourful aesthetic that the 40K universe often has, and decided not to align the Warhound to a particular Legio, but that said, I still don't want it to look... boring. I hope that by the end of this project, this won't be the case. Speaking of which - the Mechanicus detail on the groin armour was painted in 'full colour', almost as if it was a decapitated Tech Priest head that had been mounted there - another little splash of colour, and an interesting detail.

The bases used my standard colour scheme of Mournfang Brown, various dark washes, drybrush brown again, then a final drybrush of Zandri dust - this means that the Warhound will match the rest of my miniatures. The wall section and skulls were picked out in appropriate colours - I made sure that the skulls were all a little different in shade, rather than brushing them all with Ushabti Bone, for example. The feet were lightly airbrushed with brown, to represent kicked up dirt and dust - since some of the toes have been sunken into the Milliput 'ground', then it wouldn't make sense for the feet to be clean. I'm slowly embracing weathering and dirt in all of my minatures (where necessary), as everything I used to paint would be 'factory fresh' - therefore once the Warhound is finished, I will decide if weathering and damage is appropriate.

Finally, the armour panels were glued on, and the whole legs assembly was liberally sprayed with Dullcote. All done, now on to the torso, which I think will be a lot more challenging. Thanks for looking, and as a colleague of mine always says:

"Don't get lost or killed".